Technology Tips
| Site: | TAFE SA Learn |
| Course: | Faculty Gateway |
| Book: | Technology Tips |
| Printed by: | Guest user |
| Date: | Tuesday, 23 September 2025, 2:41 AM |
Description
See some tips for common problems.
Introduction
Please use this resource for tips and instructions.
Splitting Your Screen - Windows 7 or 8
I would have to say that this is the feature I use the most. It is incredibly handy when working with more than one program.
These instructions are for people using Windows 7 or 8
You will need to use two files to achieve these results.
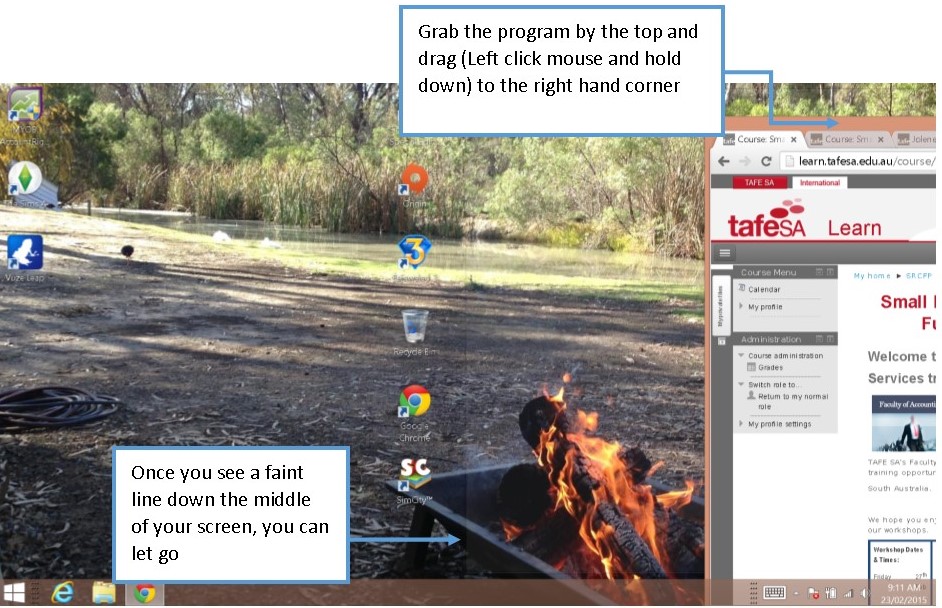
Your program should now take up half your screen
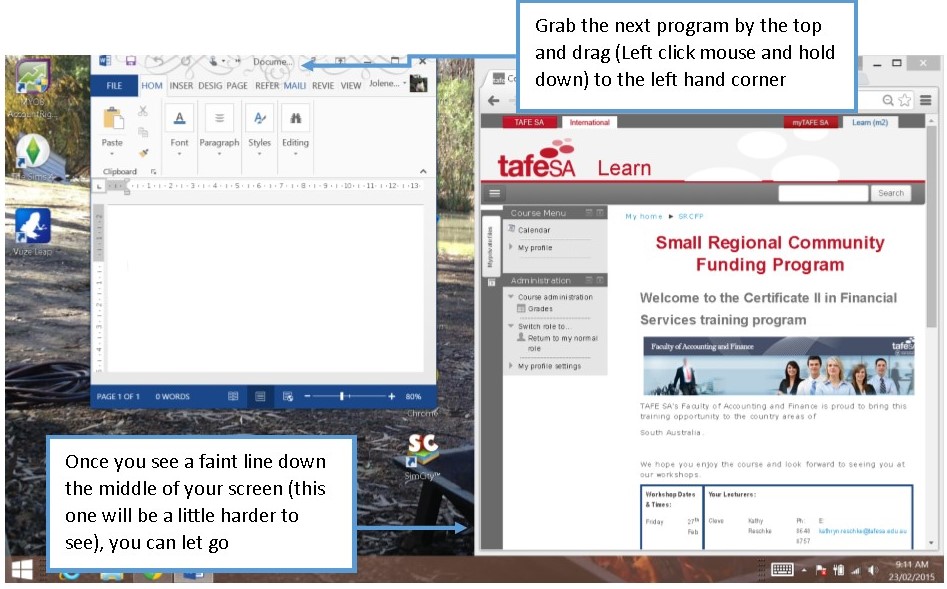
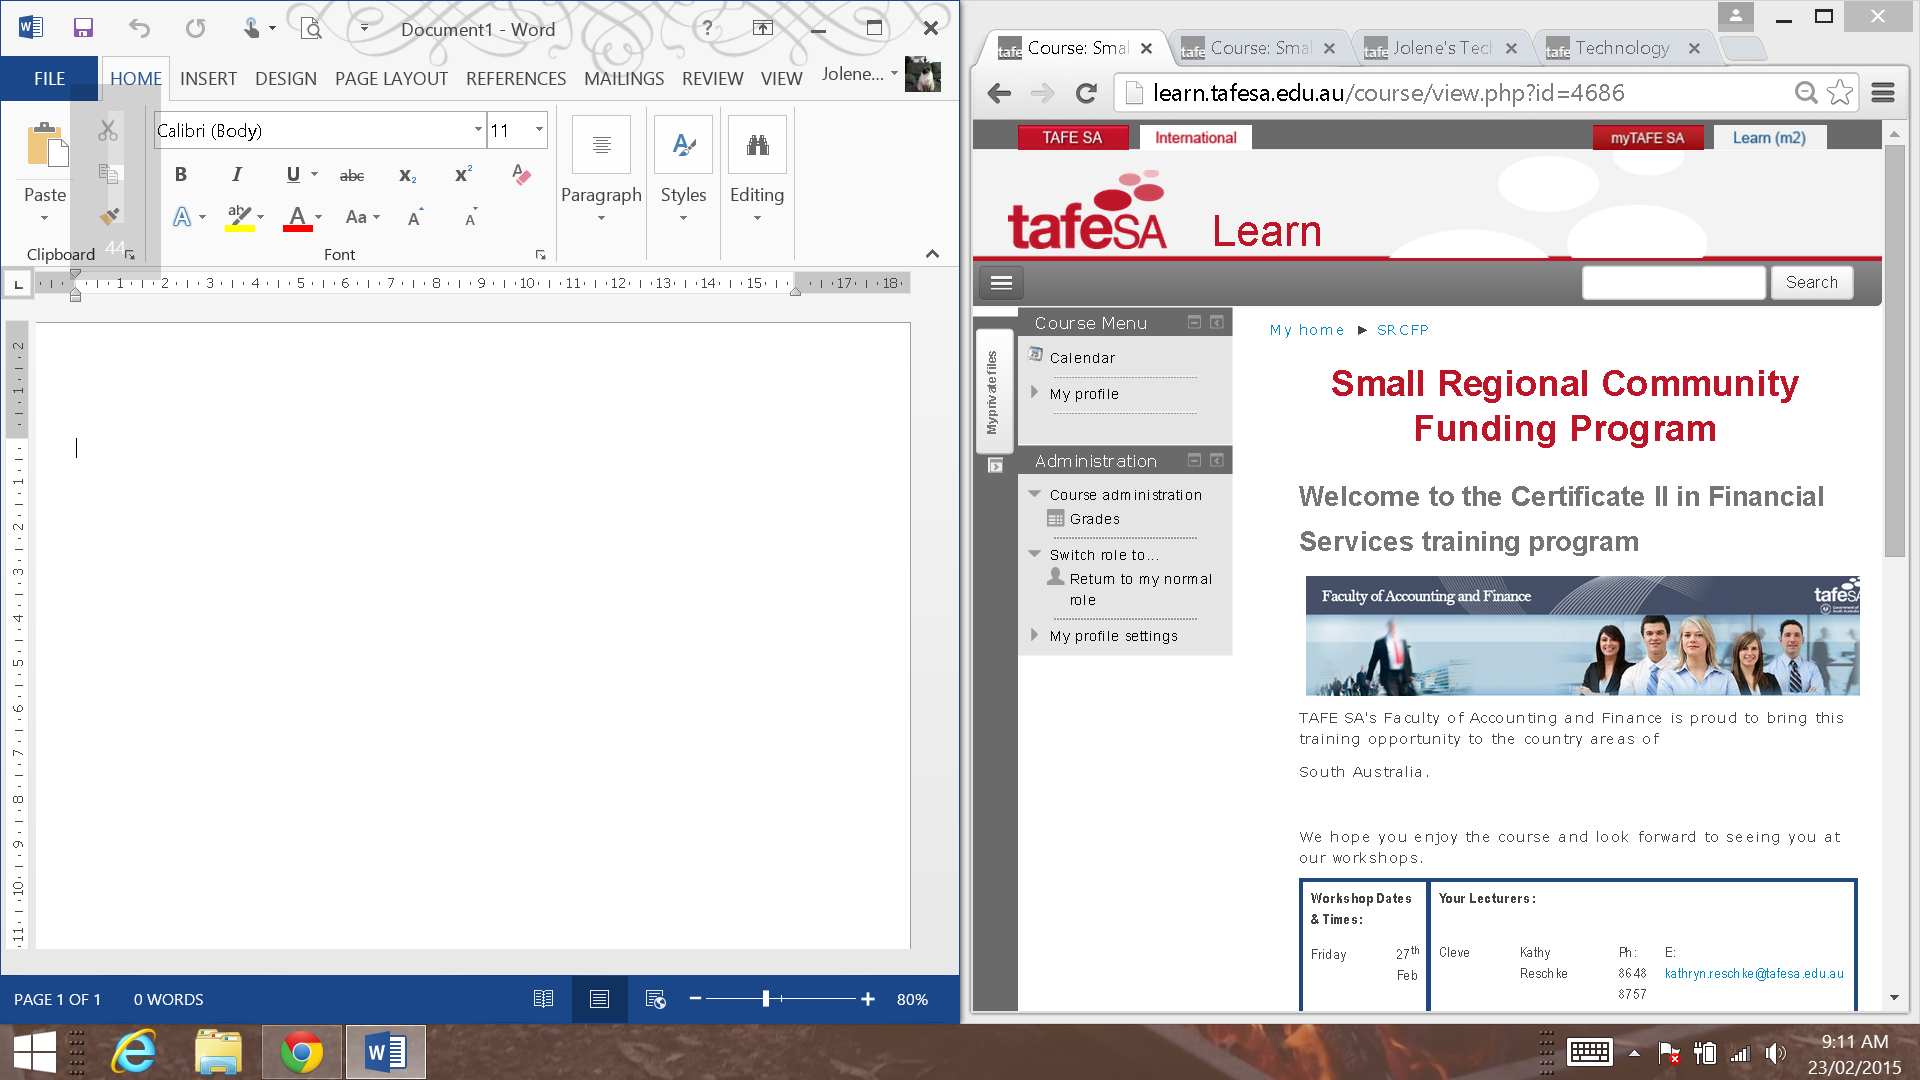
Your screen should now look like the picture below.
Splitting your Screen - Second method
If you are not using Windows 7 or 8, you can still split your screen (This option is also available with Windows 7 & 8)
You will need to have two programs/files open before you perform this operation.
Your screen should now look like this

Creating a Screen Dump
If you want to show someone what your screen looks like, please do the following (Use these instructions for any issues you have while doing this course) This is a great way to get help because you can show people what you are seeing on your screen.
- Create
a screen shot (Screen dump)
- Paste
screen shot into an email
a. Most Keyboards
Select the
![]() key
key
b. if you are using a laptop
You may need to press the
 at the same time as the Prt Scr (If the Prt Scr and FN are the same colour)
c. If you are using a windows tablet
Press the volume down button and the windows icon on your screen at the same time (The screen will flash)
d. If you are using an Ipad
Press the on/off button at the same time as the home button
 (You will hear a camera click)
a. Most Keyboards & Laptop
Ctrl + V to paste picture
b. Windows Tablet
Find the picture in your Picture folder. Select the picture with your left mouse button and hold it down, drag it to your email message and let go.
c. Ipad
Tap and hold anywhere in the body area of your email message. This will bring up the popover menu shown in the screenshot above, with a button for 'Insert Photo or Video'. Tap that button.
That will bring up a Photos dialog where you tap to choose the album you want to select a photo or video from - Camera Roll, Photo Stream etc. Tap the album you want, then tap on the image or video you want to attach.[i]
[i] http://ipadinsight.com/ipad-tips-tricks/ios-6-and-ipad-now-its-much-easier-to-attach-a-photo-to-an-email/
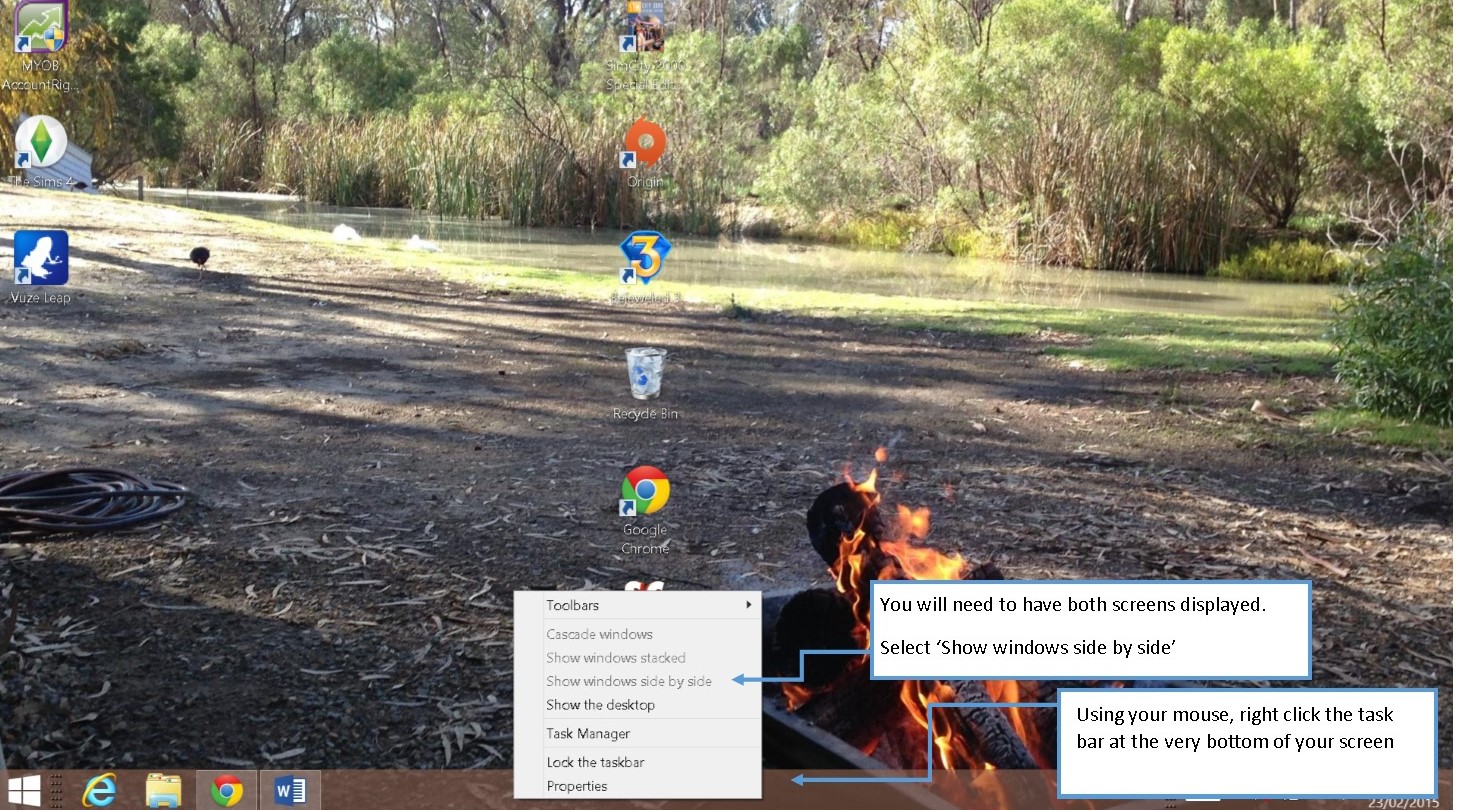
Inserting Internet Picture into LearnM2
Inserting Pictures from the internet
You can add pictures to your forum posts. First you need to locate the picture you want to use. You can search for pictures in a search engine by doing the following
1.Type what you want to search in the search bar
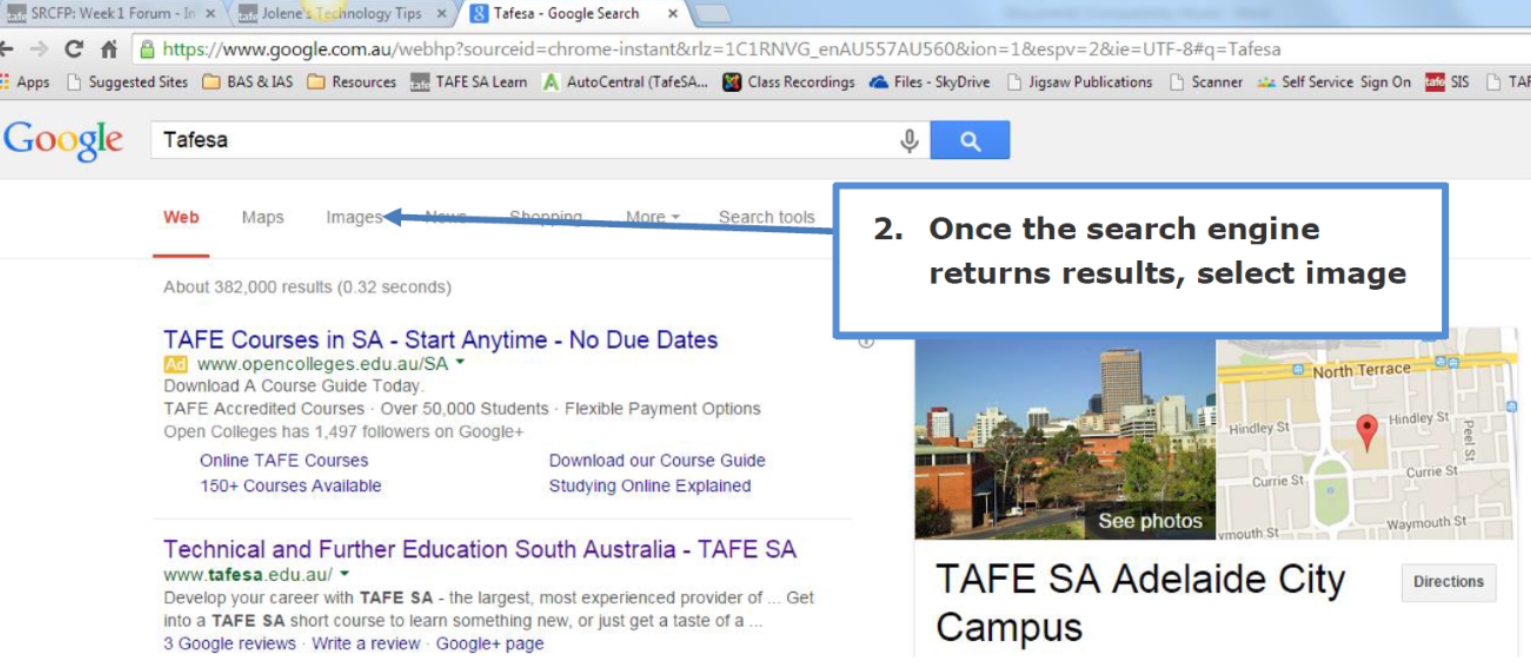
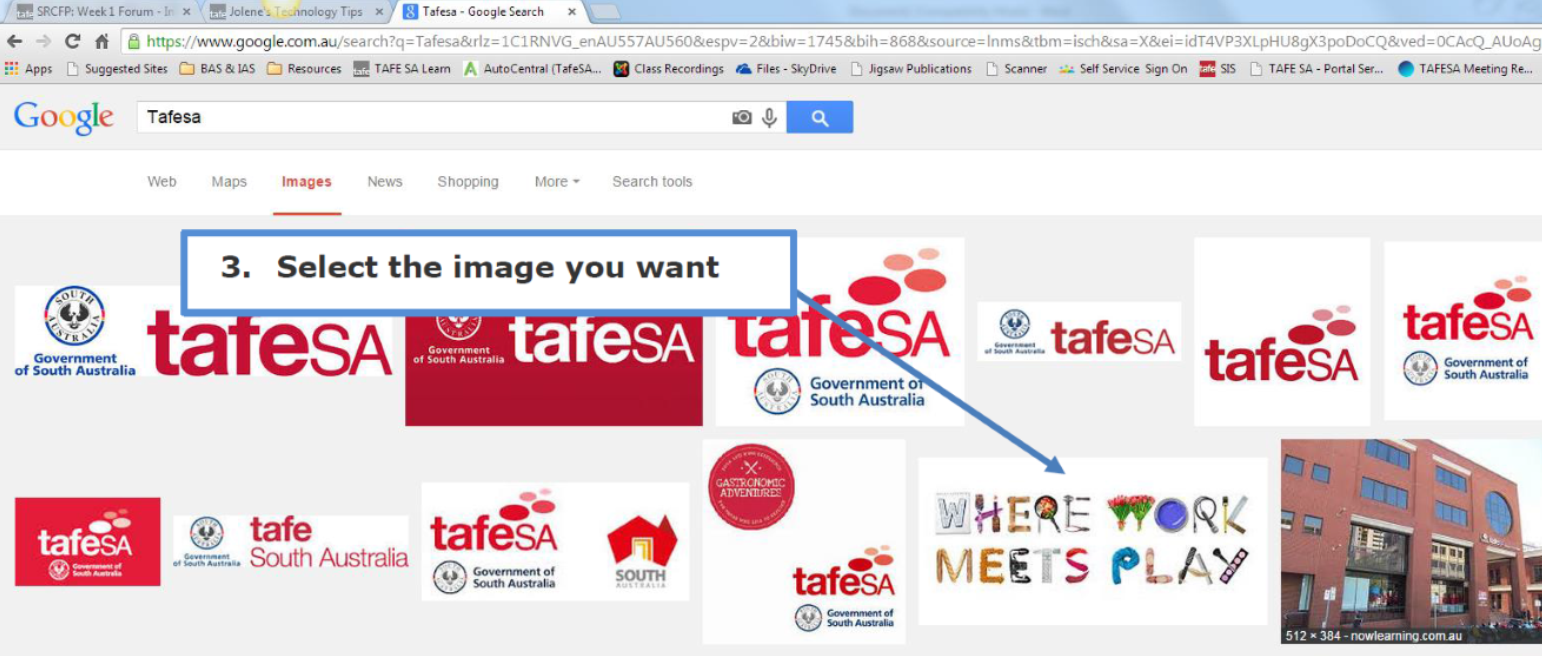
As you can see from the below screen shot, the search engine is now showing all the images
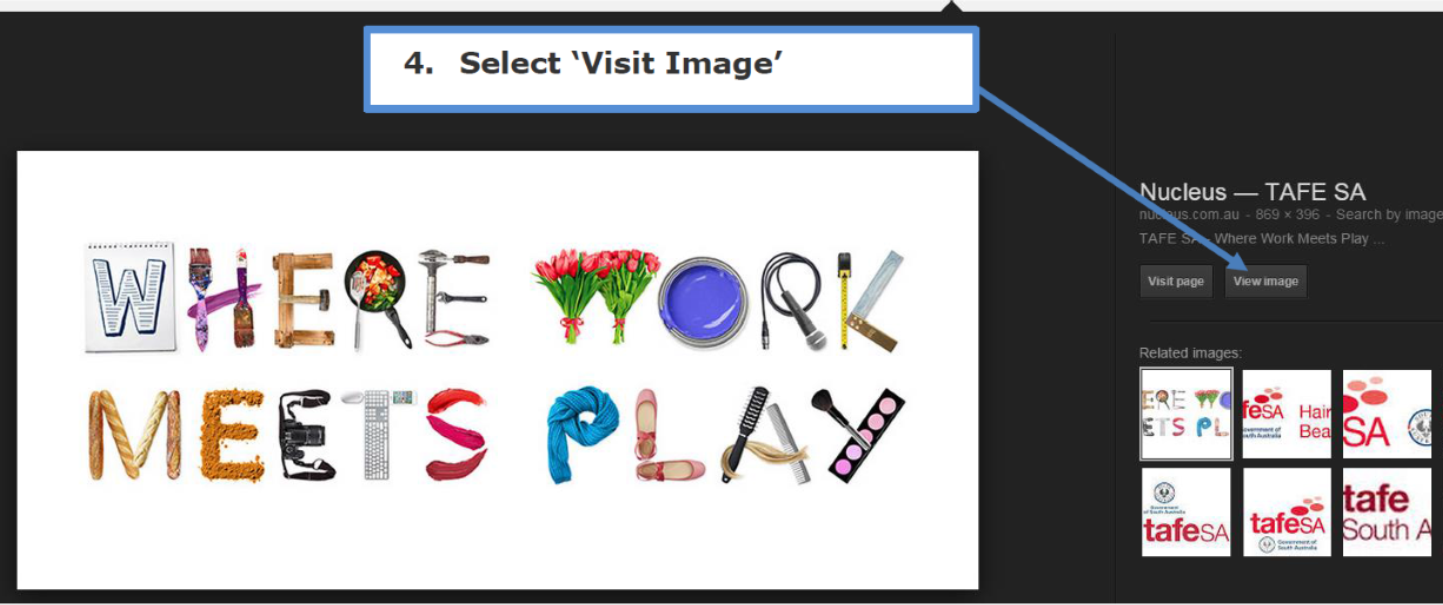
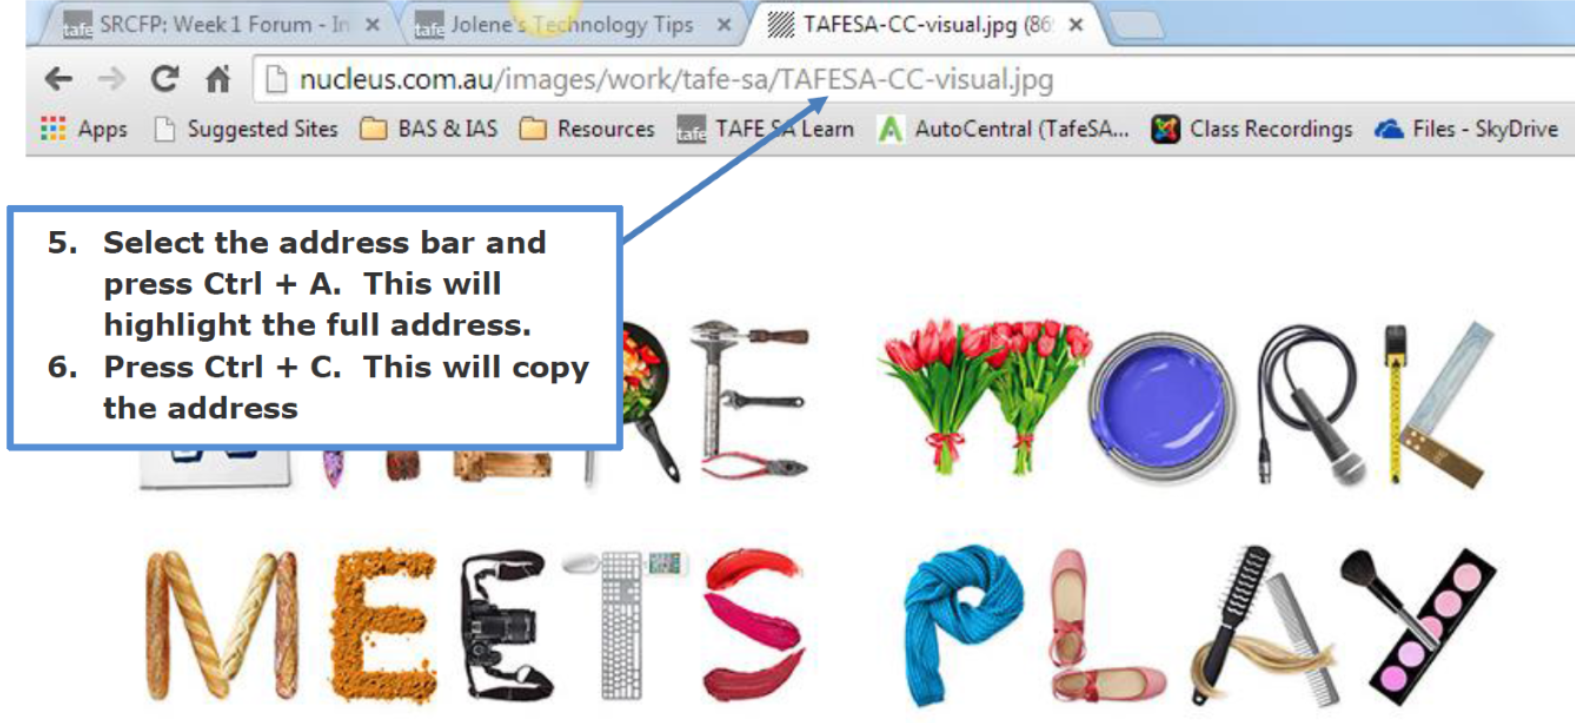
You will now see just the image. You can now copy the address of the image
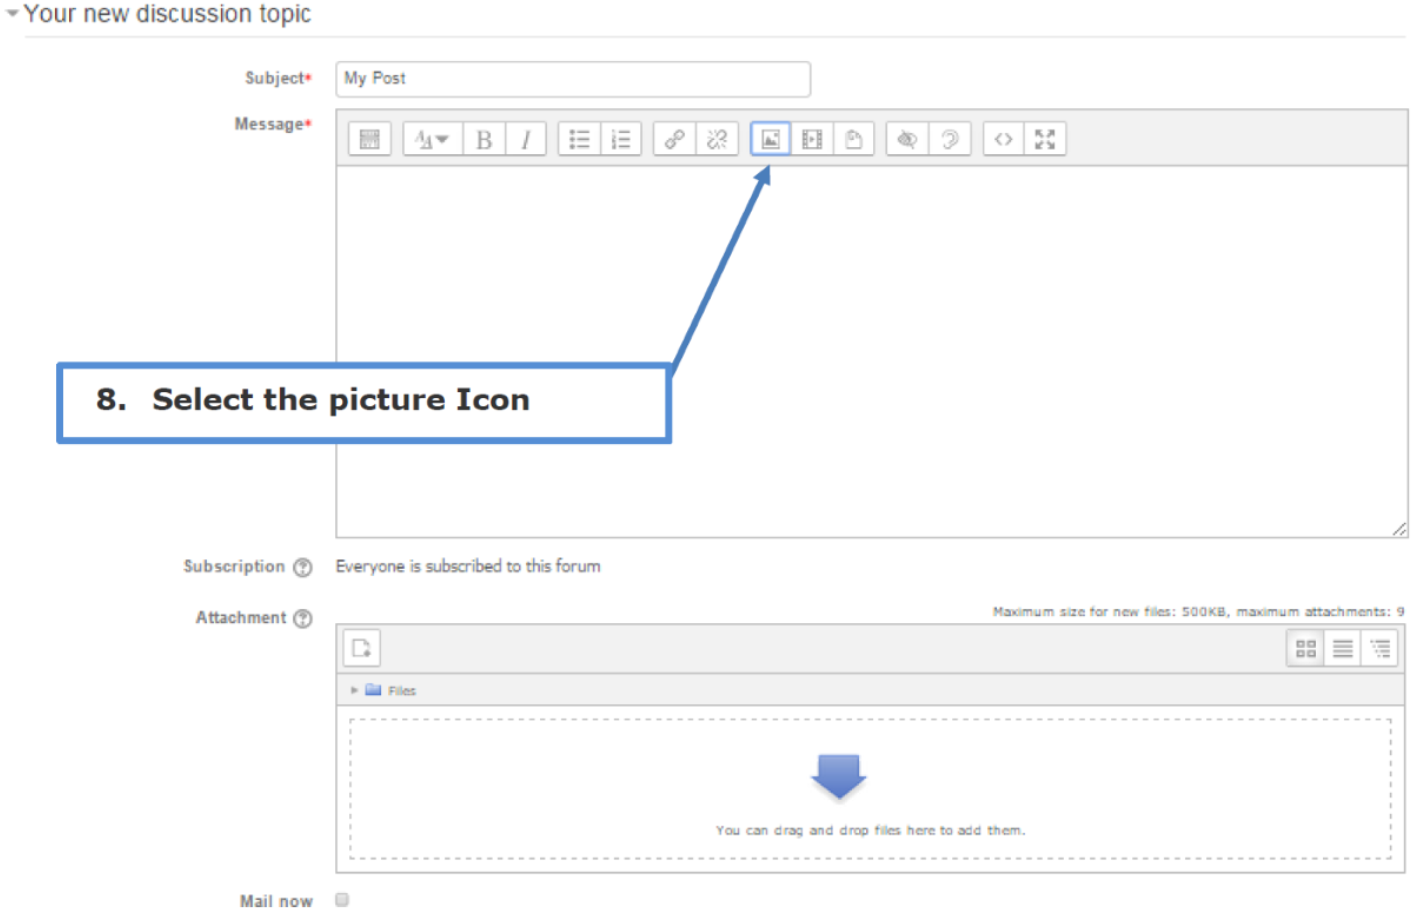
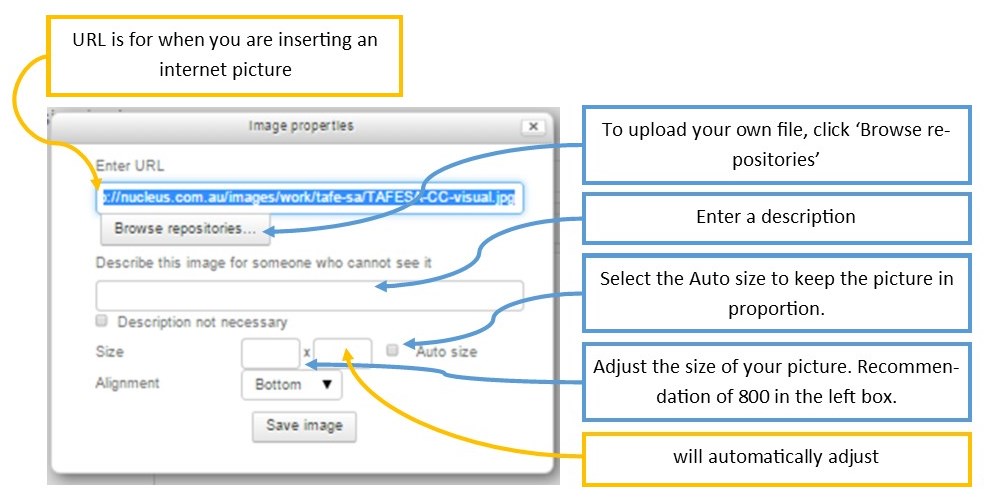
Now you are ready to insert an image in your forum post
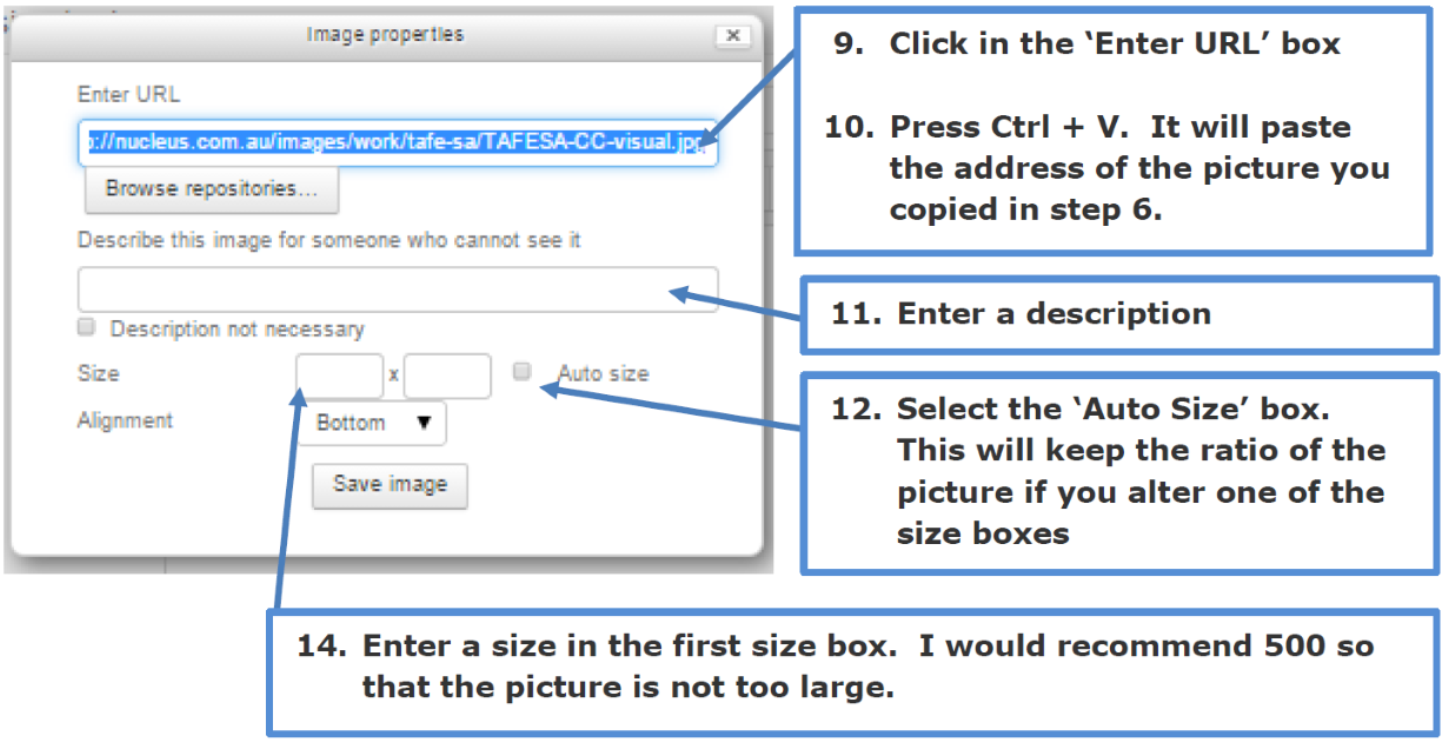
Now save the image. You have now inserted an image.
If you want to resize the image. You can double click the image and the Image Properties will appear allowing you to edit the size.
Inserting Picture files into forums.
Inserting Picture from your computer
Inserting Pictures files
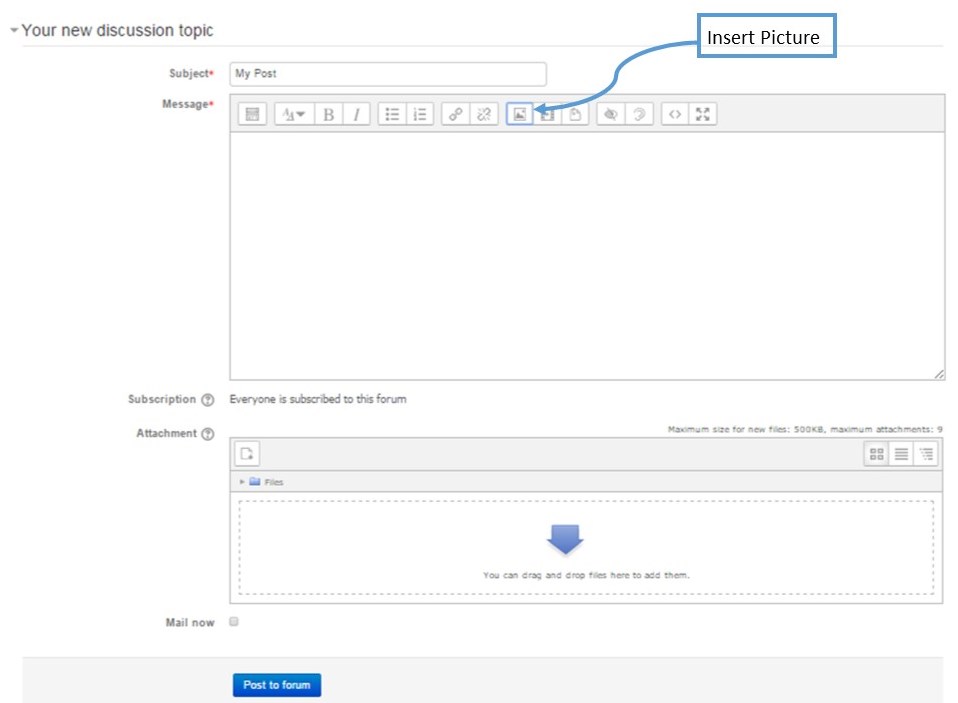
We have already looked at adding internet pictures to your forum posts. Now lets look at adding a picture file
Insert Picture
To insert your own picture file, you first need to know where you have stored it. Once you know, you are ready to insert into your forum.
Locate File
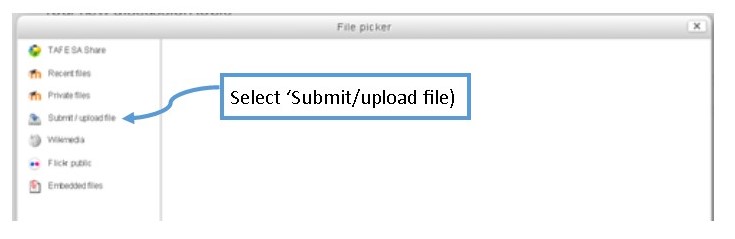
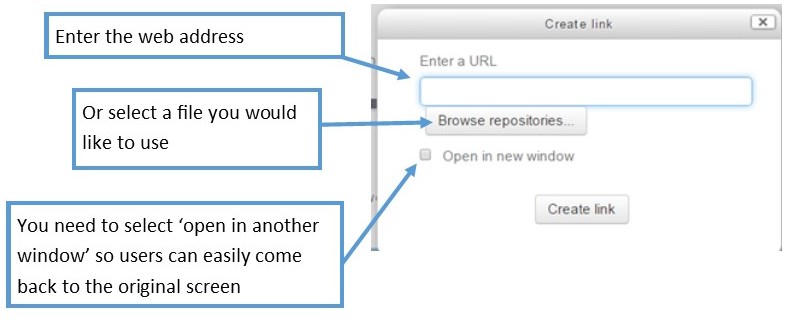
- You do not want to use the URL box as you did with internet pictures, this time you need to 'Browse repositories'. Once you locate your photo, you can adjust the size as instructed in the below screen dump.
By clicking 'Browse repositories' you can navigate to your file.
You will now be returned to the previous screen where you can see a portion of the picture below alignment. Make required adjustments and select 'Save Image'. You will be returned to your forum post where you can see the picture. If you feel the picture is too big, double click the image and the properties window will open for you to adjust the picture size.
Creating hyperlinks
What is a hyperlink?
A hyperlink is a word, phrase or even an image that you can click to take you somewhere else, either within a document, a new document, a website or even a email.
How do you know if it is a hyperlink?
With word or phrases, the text will usually be blue. when your mouse cursor is on the blue writing a line will appear under the word or phrase. This means that it is a hyperlink.
If it's BLUE, there is something to do!
How do I create a hyperlink?
Hyperlinks are a very useful way to make sure people are accessing exactly what you want them to.
Below are instructions for creating a hyperlink in an email or document as well as on LearnM2.
Creating a hyperlink in a document/ email
The first thing you need to do is type what you want to hyperlink
e.g. Please visit TafeSA to access certificate information for Financial Services
The next thing you need to do is decide on what the hyperlink will be. If you want to link to an internet site, you need to locate the internet page you want to use and copy the address from the address bar (Ctrl + A will highlight the full address. Ctrl + C will copy the address)

Now that the sentence is typed, you can pick which word/s will be used as a hyperlink. In this case, we will use TafeSA.
Highlight the word TafeSA. Right click on the highlighted word and select 'Hyperlink'
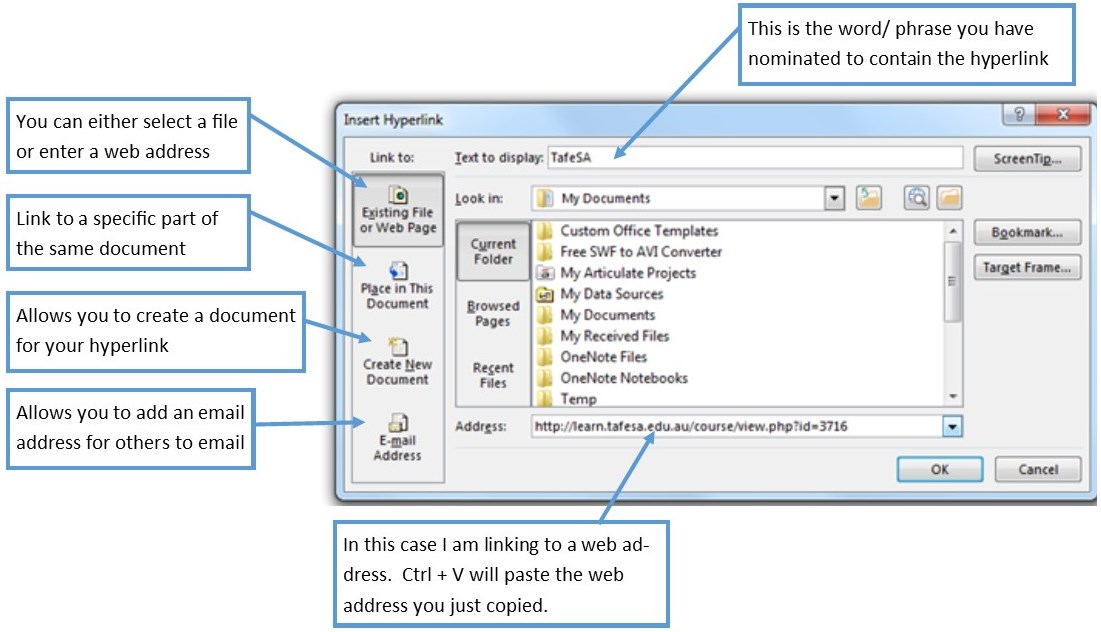
Press 'OK' and your hyperlink is created.
Creating a hyperlink in a LearnM2 forum
The process is basically the same when using LearnM2. The only difference is how to connect the hyperlink to the word/phrase.
Select the word/ phrase you want to use as your hyperlink
Select the hyperlink button
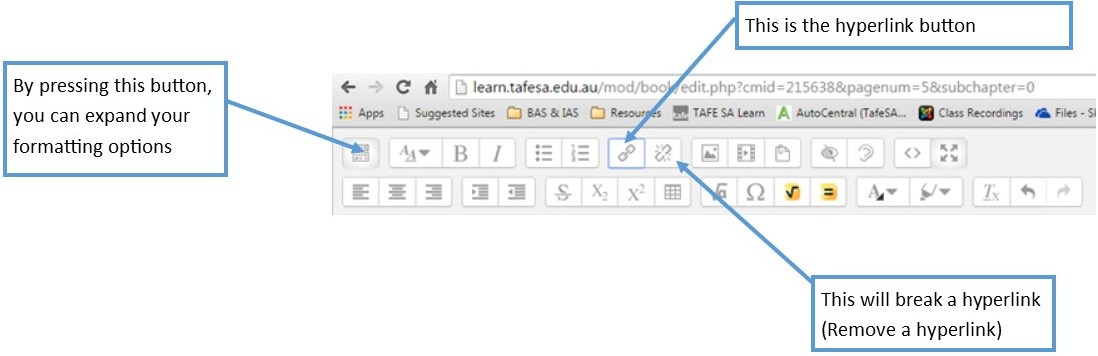
Press 'Create Link' and your hyperlink is created.
Uploading completed tasks
There are two ways to upload documents in a Learn (m2) course.
•Drag and drop
•Find and select
Drag & Drop
For drag and drop, it is best to have your screen split.
You should be able to see your folder containing your completed document and LearnM2 next to each other.
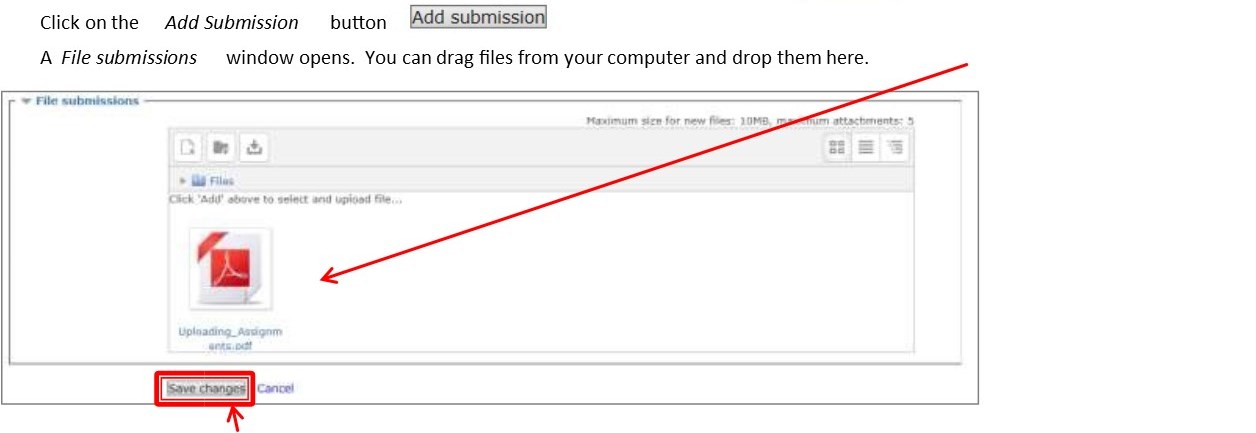
You will need to hold your left mouse button to be able to move the document (It will still leave a copy in your folder)

Click on 'Save changes'
Find & Select
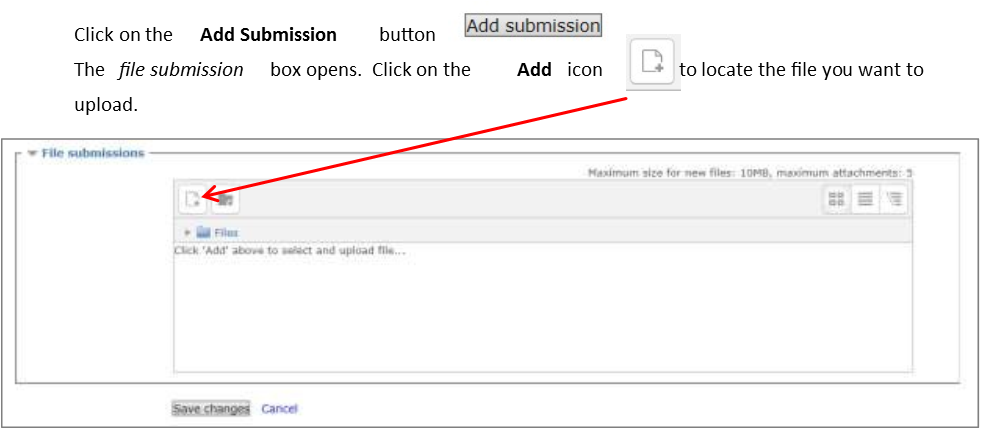
Click on Browse to locate your file
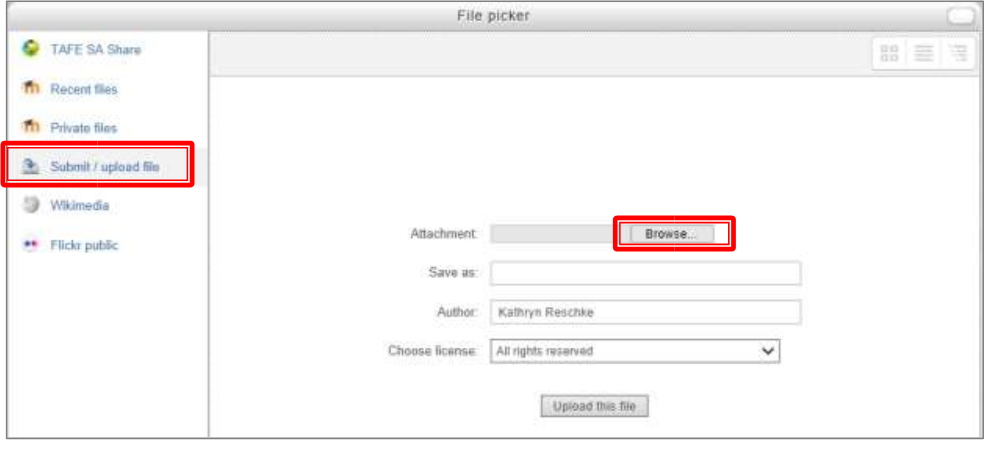
This will open another window. Find the file you wish to upload and click Open.
The file is now uploaded. Click Save changes
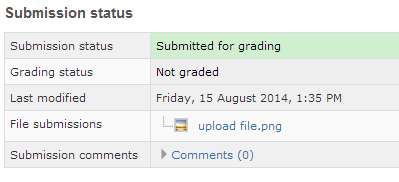
Submitting Work
Now that you have attached your file, your submission status will turn to Draft. If you have uploaded all your work, you are now ready to submit. Once submitted you will not be able to make any changes to this document.
Press Submit
you will be asked to confirm the assignment is
your own work.

Press Submit
You have now completed the upload. and your submission status will change to green.
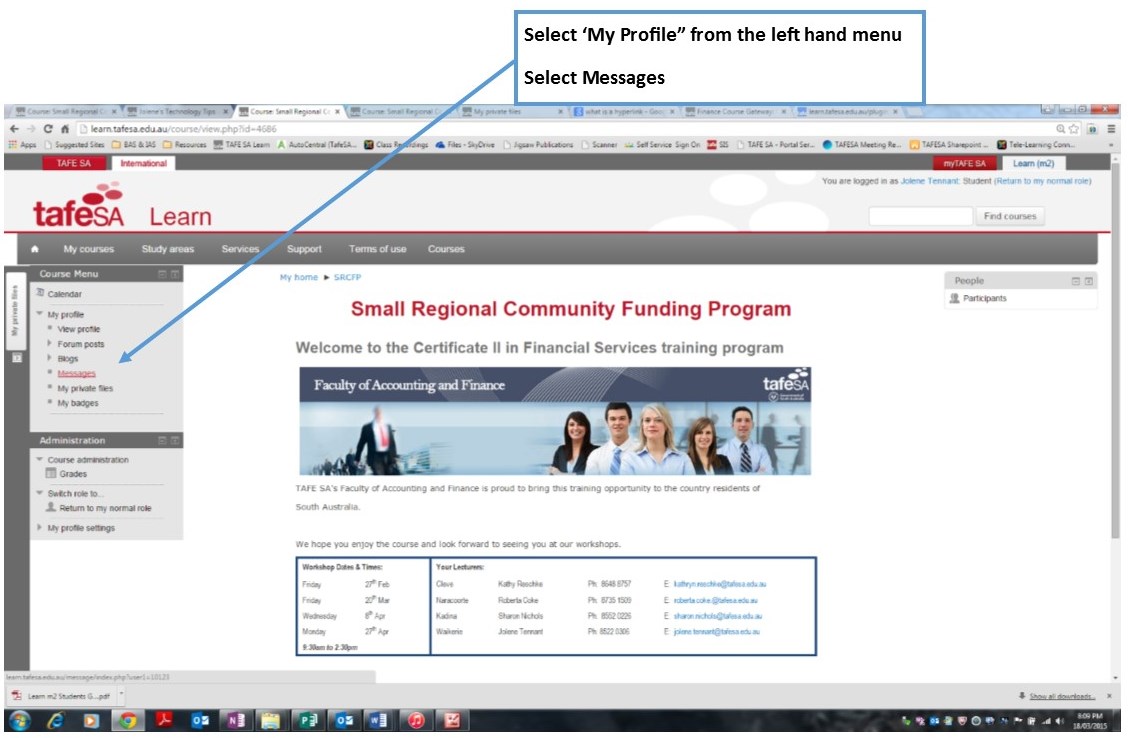
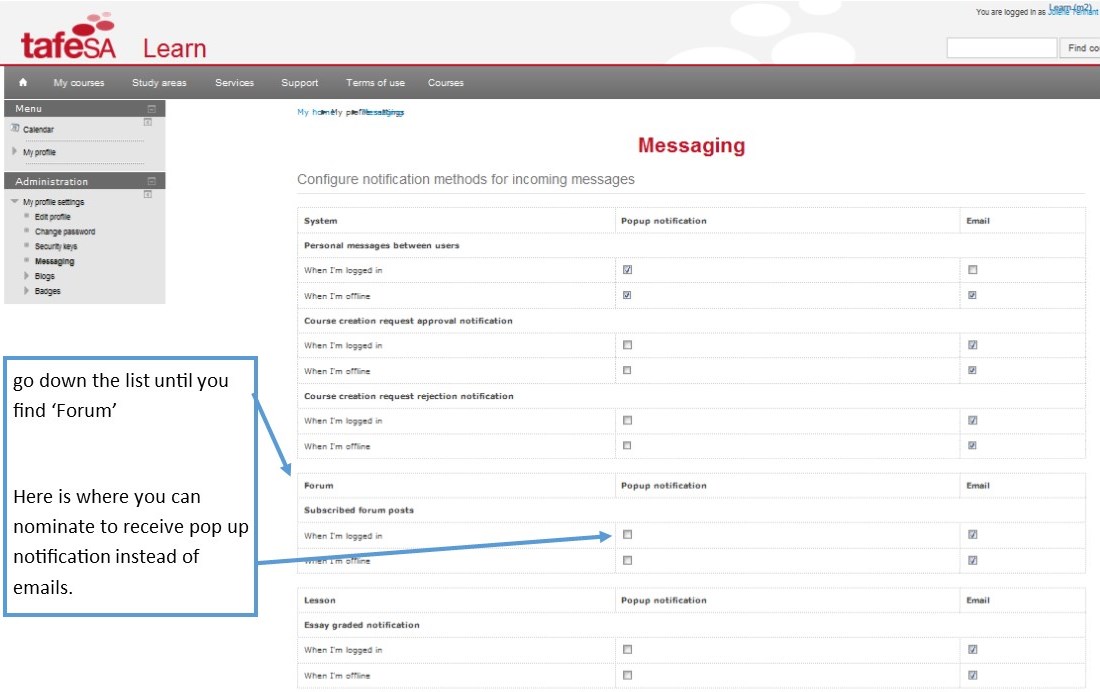
Nominate how to receive forum notifications
There have been so many fantastic forum posts. I am sure you have been enjoying them as much as I have. It can become a bit of an issue when you have limited internet access.
You can nominate to stop receiving forum updates by email and to only receive them when you are online.
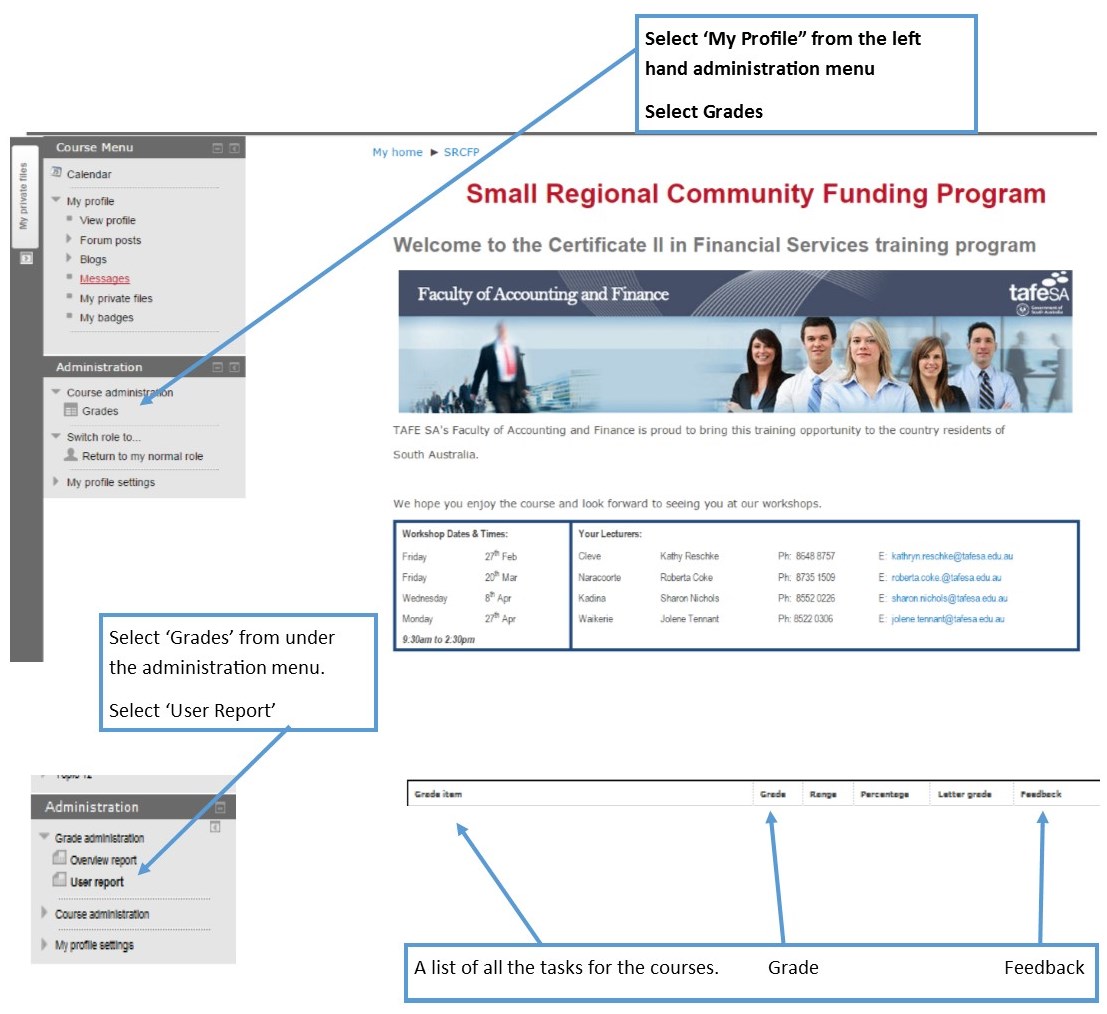
Checking your grades
You can check where you are up to by having a look at the gradebook.This will help you see what you have completed, and what you have left.